Organise your project file structure to make project management easier
There are many things to keep control of when creating and then maintaining a successful SoC project. If we consider all factors and stages of a project's life, it contains a considerable amount of data; previous reusable IPs/project data, imported custom IP/data from new ideas, system level data for gluing logic, etc. Hardware design is complicated enough, and full microprocessor based SoC device fabrications are quite challenging. David has a great post about an Arm Cortex-M0 based SoC project (Arm Cortex-M0 microcontroller | SoC Labs). In this post I use that project as an example and explain the steps I am taking to give me an easy to understand SoC project structure using file system management to keep things well organised.
Using Git for version control
I always recommend using a version control system. My suggestion is to use Git SVC system for your projects. Subversion and other systems are fine but Git is becoming a well used method in the community for easy compatibility. Please have a look at my Git project management post for details, installation, and maintenance.
You may find it helpful to check my previous post on First Voyage of Arm Academic Access (AAA) licenses to get some initial information and set things up.
Please remember each researcher may have a different workstation and project environment. In this article I use Red Hat Enterprise Linux as a host system. Lance has a great article about setting up the environment Lance Draper, creates a sharing environment for Arm Academic Access | SoC Labs
First, I would like to separate my experimental development parts from my original source parts. Let’s say your Arm AAA IP downloads goes into your design source directory.
Let’s call this new directory as “Arm-IPs-installed" in the home folder.
$mkdir –v Arm-IPs-installed

Arm IPs are the downloaded original Arm IP sources, they come in standard GNU tar and zip compressed form "tar.gz".
Let’s keep them as it is at the source while copying them into the new development folder "Arm-IPs-installed".
$cp –vr ~/Downloads/ArmIPs.tar.gz ~/Arm-IPs-installed

$cd Arm-IPs-installed
This folder where I extract each of them.

$cd ..
tar –xvzf ~/Downloads/ArmIP01.tar.gz Arm-IPs-installed/
As an additional level of security, it’s better to identify a secure patching space as a folder, so I secure them by copying the main modules into "designstart" folder. This is where I link EDA tools to our Arm IPs. Such as ../../designstart/Cortex-M0, ../../designstart/Corstone-101
$mkdir –v designstart

Now I can copy our extracted IPs into designstart folder.
$cp –v BP306-GRP-r0p1-00rel1 AT510-GRP-r2p0-00rel0 /designstart/

These BRP306* and AT510* packages are Corstone 101 and Cortex-M0 development IPs. When they are in their place the designstart folder should look like:
$ls –la designstart/arm-ip-installed/
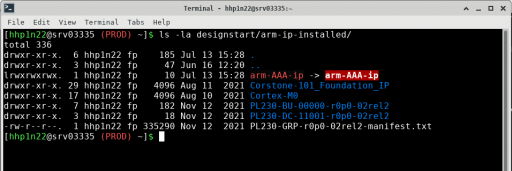
Now, this list confirms all IPs are ready for EDA tools.
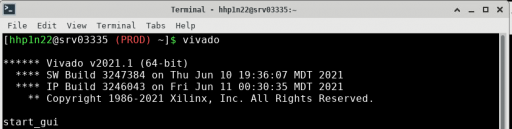
From this point, I can continue my project development either FGPA or ASIC flow. It's your choice which EDA tools you would like to use going forward. Xilinx Vivado launches smoothly.
$vivado
All IPs are linked correctly under the "designstart" folder.This folder can easily provide symbolic links to other EDA tools for compatibility.
I am curious to hear how your data challenges have started and which parts and tools you find helpful and which parts need improvement. Let me know in the comments section.
 Hakan Pekmezci
Enterprise Fellow
at University of Southampton
Research area: Design
 Cortex-M0
Submitted on
Add new comment
To post a comment on this article, please log in to your account. New users can create an account.